
When it is not enough to buy a ready to use sensor or controller, look into creating your own ESP-node ![]() . It has never been easier thanks to the great developers of ESPHome. The software package is available for local installation on a computer and also as an add-on in Home Assistant. Anyone delving into the field of ESP-nodes must try ESPHome
. It has never been easier thanks to the great developers of ESPHome. The software package is available for local installation on a computer and also as an add-on in Home Assistant. Anyone delving into the field of ESP-nodes must try ESPHome ![]() .
.
How to get started
The easiest way to try programming an ESP-node is to have ESPHome installed on a computer and attaching the node hardware directly with a USB cable. Follow the installation instructions here ![]() .
.
The USB cable can be detached when the node is booting correctly and connecting to your wireless network. Further developed or adjusted programs can be installed on the node over the network connection, also known as “over the air”.
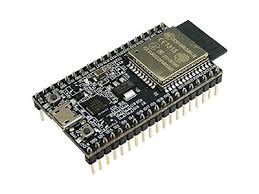
ESP-node hardware is available from a vast range of manufacturers in several different configurations. A good start is a development board from a manufacturer directly supported by ESPHome. The full list of boards is available here ![]() .
.
Connecting peripheral hardware
Every ESP-node has a purpose, or several depending on the implementation. ESP-nodes are especially well suited for creating different types of sensors, for example temperature, humidity, pressure, light intensity, motion detection, voltage, current, magnetism, and much more.
Nodes can also be programmed to operate relays, electric motors, actuators, and similar devices. The number of use cases is almost unimaginable. If there is a suitable module or component in ESPHome then a solution is very well within reach. The current range is impressive and still increasing.